
Monday, February 4, 2013


Friday, February 1, 2013
Art Beat: Color Your World
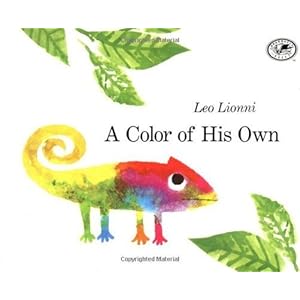 A Color of His Own by Leo Lionni, tells the simple tale of a lonely chameleon who searches for his own color. In the story, he sees that an elephant is gray, a pig is pink, and a parrot is green. Since every other animal has their own color, why shouldn't he? He hops on a green leaf in hoping to be forever green. To his surprise, he turned yellow and red in autumn, then brown and black in the winter until he fell off the leaf. When spring came, he stepped onto the green grass where he met another chameleon. At this point, the two became friends, always changing colors together.
In a way we are all chameleons, searching for our own color, or identity. This crazy fast paced world makes it so easy to follow trends, losing sight of our authentic selves. Just like the chameleons, we need to find souls who share our dreams and creativity, and views of the world.
I felt great joy reading this story to my children. Their eyes shone bright, identifying the animals and colors on the page. We discussed the chameleon's environment, and the why his color changed with each season. We also discussed the importance of finding a friend.


Enrichment Ideas
Older children can explore a chameleon's natural environment. Ask children to pick their favorite environment, what color would they be? Would they fit it? Would they be lonely? Would they have a friend?
Make backgrounds and chameleons that represent all four seasons. Pick colors that represent each season.
Write an adventure story about the chameleon and his friend.
Tuesday, January 29, 2013
10 Things You Wish You Knew About Me
For you curious readers, here are 10+ facts about me:
1. First born.
2. Left handed (so are my two younger brothers.)
3. I was born on a Sunday (so were my two younger brothers.)
4. Greek-American
5. Studied 5 years of Italian.
6. I still remember my address in Florence: 14 via Castellani
7. I still nurse my 28 month old daughter.
8. My guilty pleasure is listening to 80's Freestyle Music.
9. My favorite food is pastichio. (Greek Lasagna)
10. He may not think so, but I adore him.

Monday, January 28, 2013


Monday, January 21, 2013
Project Life 365- Week 3
Here is this week's installment of Project 365.
A #forgotten box of books in the attic. Homemade donuts are the ultimate #temptation. Isn't it #confusing that the baby prefers broccoli over pizza? The first #sign_of_winter = more than an inch of snow. I get my #news at Five Guys. An unexpected joke gets me smiling #this_is_so_me. My husband's make shift cufflinks showing off his #style. Until next week......


Friday, January 18, 2013
Have You Made Your Mark?
Friday Art Beat
I am beginning a new Friday series called, "Friday Art Beat." Every Friday I will post an art lesson based on concrete art pedagogy which will engage children to think creatively and critically. The goal of these lessons is not to create a masterpiece, but to teach your child how to question and think deeply about art concepts. Since, I have pre-school/toddler age children at home, I am tailoring the lessons towards this age level. Yet, I will also offer means to adapt these concepts towards older children.
The Dot, by Peter Reynolds

In the same way, "The Dot" tells a similar story of a very insecure little girl named Vashti. It begins when she tells her art teacher that she, "just can't draw." Her art teacher brilliantly tells her to "just make a mark and see where it takes you." Vashti takes a marker and stabs the paper with a dot. The teacher studies the dot and proceeds to tell Vashti, "now sign it." The next week Vashti enters the classroom to find her dot and signature framed above the teacher's desk. Her fear dissipates and her confidence grows. She spends the next few days creating dots of all shapes and sizes. Before she knows it, she has enough artwork to be presented in an art show at school. All of her friends are amazed at her work. In the end, Vashti friend, lacking in confidence, asks her how to draw, she tells her friend to, "make a squiggle" and "sign it."
This sweet story reminds us that we are all vulnerable and get stuck in what we think art should be. Our fears dictate our thoughts where we are not free to create. I read this story to my 4 year old and two year old. My four year old was mostly impressed with the art show part. My two year old was indifferent (as with most books).
Before we started the lesson, we discussed circles and dots. I asked them to go around the house to find objects that were circles. Simon zeroed in on the donuts we made the previous day and Vivi found some circle puzzle shapes.
We used our objects as inspiration for our artwork. I gathered some watercolor paper, tempera paint, contact paper, and scissors. The easiest way for me to show Vivi how to make dots, was to create a paint resist on her paper. I cut out various circles shapes out of contact paper, and had her stick them wherever she wished on the page.

I let her choose her paint palette, which consisted of blue, yellow, brown, red, and white. I stepped back to let her make her own creative choices. If she wanted to mix colors, I let her. If she wanted to change brushes I let her. I gave no input or instruction, except cutting out the circles.
Simon was more interested in creating his own dots with his paint brush. The dots turned into huge splashes, which wound up on my walls. Yikes!! Yet, it was tempera and completely washable.

In the end, Simon became interested in creating a dot resist with the stickers. He of course chose only blue and brown. Once the paintings dried, I removed the stickers and framed them.

Enrichment Activities:
Ages 2-5
- Cut out circle sandpaper circle shapes in various sized and have child trace circle with their finger.
- Make dots out of play dough.
- Have child trace circles using circle templates
- Go on a circle treasure hunt around the house.
Ages 6-9
- Offer students a variety of materials to create their masterpiece.
- Colored paper in various sizes.
- The end of an eraser they can dip in paint.
- Create a crayon dot resist.
- Students can write a poem after they complete their artwork. (Click on the link for ideas).
- Students can have an art show and discuss and critique their work.

I hope this lesson has inspired you, your child, or a student to "make your mark!"
Have you ever felt insecure about your artistic abilities? I would love to hear your story.
Wednesday, January 16, 2013
The Queen City
About 2 weeks ago we took a road trip to visit extended family in Cincinnati, OH. For me this was a fun and nostalgic visit. I went to grad school at the University of Cincinnati, so I enjoyed showing my husband and children The Queen City's architecture and vistas.
I bet you are wondering why Cincinnati is called, "The Queen City?" Apparently, Cincinnati grew so rapidly that by the 1820's it was considered the Queen City of the western frontier.
Our first stop was the Kroger building, where my very talented cousin-in-law, Jonathan Queen and his interns were commissioned to paint this mural. Definitely check out Jonathan's artwork, his work is fantastic!

After a quick coffee stop downtown, we drove through the University of Cincinnati campus, then up through Eden Park where we passed through the Cincinnati Art Museum campus. We then stopped to snap up some Ohio River views.


I bet you are wondering why Cincinnati is called, "The Queen City?" Apparently, Cincinnati grew so rapidly that by the 1820's it was considered the Queen City of the western frontier.
Our first stop was the Kroger building, where my very talented cousin-in-law, Jonathan Queen and his interns were commissioned to paint this mural. Definitely check out Jonathan's artwork, his work is fantastic!
After a quick coffee stop downtown, we drove through the University of Cincinnati campus, then up through Eden Park where we passed through the Cincinnati Art Museum campus. We then stopped to snap up some Ohio River views.
